My first ever blog entry on BBPD -
an eyelash fitting trick - has been getting some new attention lately. For some people, the "trick" I discovered and shared there is enough to help them
finally fit their lashes, but others need more help. I found a pair of lashes in my inventory that I hadn't fitted yet, so I'll walk you through my process and hopefully it will help you wear those pesky (but necessary) prim eyelashes with confidence.*
If you haven't already, go into appearance mode. Click "shape" to edit your shape, then "eyes" and scroll to the bottom. Make sure your
eyelash length is set to 0. We don't want those unsightly system eyelashes getting in the way!
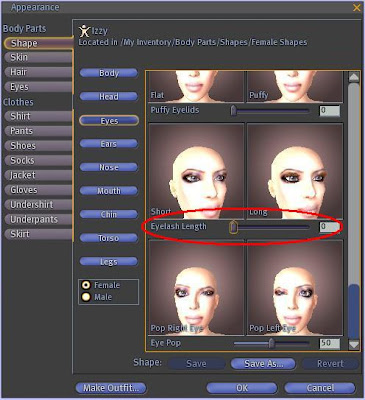
If the lashes are copyable, I suggest you make a backup of them before you proceed. I usually add "BACKUP" on the end so I know which one is the original.
Once I pull them forward a bit, I make sure each prim on the right is the same size as its match on the left. In the beginning I had such trouble fitting the left side until I realized... nearly all of my left side eyelashes were different sizes than the right side lashes!
(I have no idea why so many designers do this.) Now I resize each side to match the other (copy and paste are your friends.)
 IMPORTANT:
 Make sure "edit linked parts" is checked, and that you have ONE prim selected before changing anything in the size fields. You don't want ALL of the prims to be exactly the same size; you want the
top left to be equal to
top right, and
bottom left to be equal to
bottom right. If you make a mistake, hit CTRL and Z to undo your last change.
For now, I'll ask that you forgive my poor photo editing skills. I promise you I'm much better at editing lashes than I am at post-processing pictures!
This is where the mannequin skin and eyes from
Imagen come in very handy. There's no makeup to get in the way of the editing process. You could also use a bare system skin, but I think the stark contrast of white on black makes things a
lot easier.
Pressing CTRL will bring up the compass so you can edit rotation. Hold down CTRL and drag the directionals with your mouse. Play around with them a bit. It will probably take a while and a considerable amount of adjusting on all 3 axes to make the lashes follow the curve of your eyes, and to ensure no part of your face pokes through.
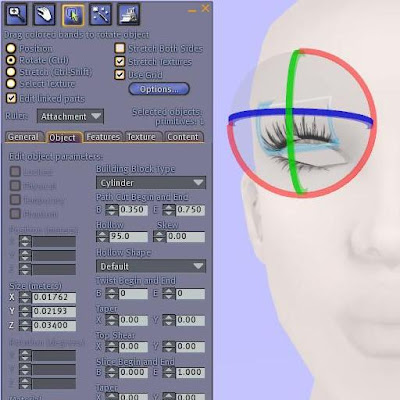
If you feel you need to zoom in closer, hold down CTRL and hit 0 (zero) until you're at a comfortable zoom. (CTRL 9 will snap your camera back to its normal position.) You can also edit camera controls under Preferences > Input & Camera.
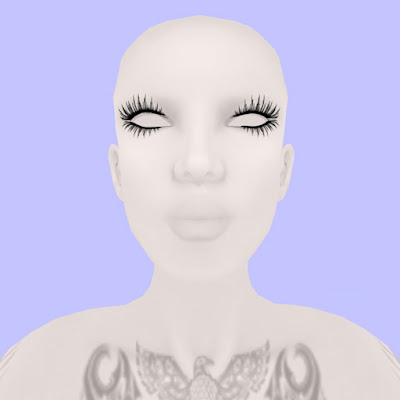
This is what my lashes look like after a good bit of editing (a few minutes per prim.)
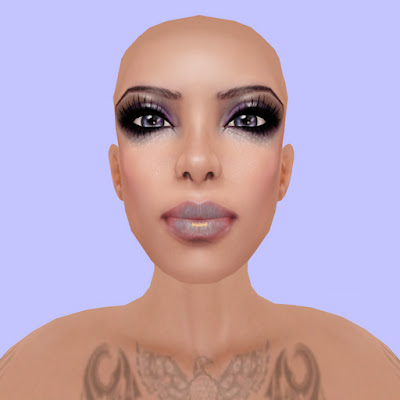
And with a skin:
If you change your shape, you will likely need to re-fit your lashes. If you can, always use copyable eyelashes and put a set in with your shape if necessary. (I rarely change my face, so this isn't an issue for me.)
Credits:Mannequin skin and eyes:
Imagen (slurl updated August 2010 after store move)
Eyelashes:
Staged Extend Lashes
Tattoo:
Otaku Designs (now Lolapop) Azteca Tattoo
Skin:
LionSkins CANA PALE 7
Eyes:
Umedama Holic Frozen eye (gift 07)
* = Disclaimer: Due to the wide variety of shapes and textures used by designers, this basic/beginner level tutorial may not work with all lashes. There are lashes in my inventory that required intensive editing of not only the size, path cut, and hole size of the prims, but the texture repeats, rotation, and offsets as well. I believe
all lashes can potentially be fitted to your shape, but you may need to have a certain level of comfort with building in order to do so.


